Table of Contents
Table of Contents
Canning raspberry jam has become one of my favorite kitchen rituals. It started years ago when I stood on a step stool beside my mom, watching her fill warm glass jars with the jam we made from fresh backyard berries. Those raspberry bushes gave us more than fruit — they gave us moments I still carry with me.
Each summer, I keep that tradition alive in my own kitchen. There’s something comforting about hearing the lids “pop” as they seal, knowing I’ve captured a bit of summer in every jar. Canning raspberry jam isn’t just about preserving fruit — it’s about preserving connection.
And the best part? It’s so much easier than it looks. You don’t need special tools or fancy ingredients. Just raspberries, sugar, and a bit of patience. The same method works beautifully for other classics like Canning Grape Jelly and Canning Blackberry Jam Secrets, both timeless recipes that turn fresh fruit into pantry gold.
What Makes Raspberry Jam Perfect for Canning
Choosing your raspberries
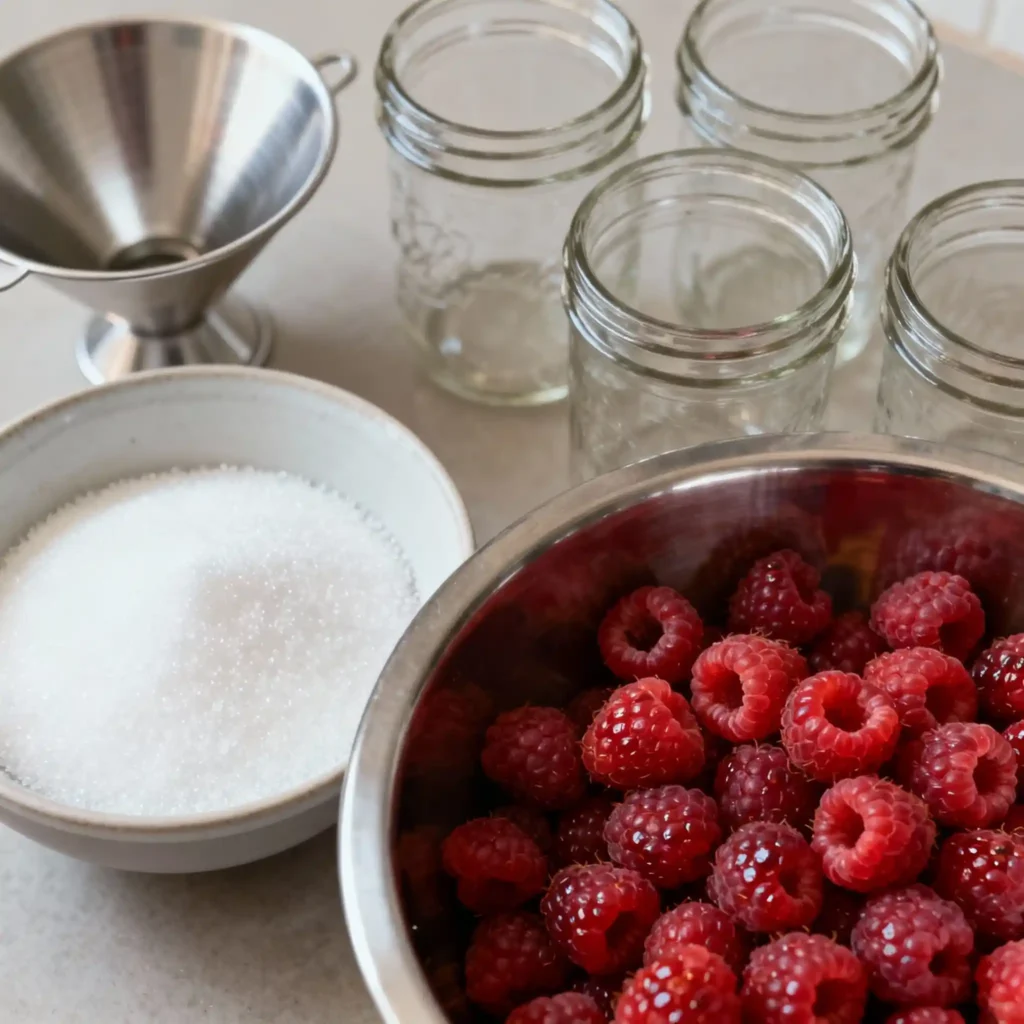
The foundation of successful canning raspberry jam lies in starting with the right berries. Look for ripe, firm raspberries that are deep red and fragrant. Overripe or mushy berries can throw off the texture and reduce the jam’s shelf life. If you’re picking your own, aim for dry mornings after the dew has evaporated. Store-bought raspberries work too—just avoid any with mold or soft spots.
Wild raspberries add incredible flavor if you’re lucky enough to find them, but their yield is often small. Whether wild or cultivated, rinse the berries gently and let them dry before mashing. For every cup of mashed fruit, expect to start with about 2 cups of whole berries. Remember: clean, fresh berries are key to great results when canning raspberry jam.
Sugar ratios and why pectin isn’t needed
Raspberries already contain enough natural pectin to set beautifully. The traditional rule is simple — one cup of mashed fruit to one cup of sugar. This gives your jam a classic sweet-tart balance and a thick, spreadable texture.
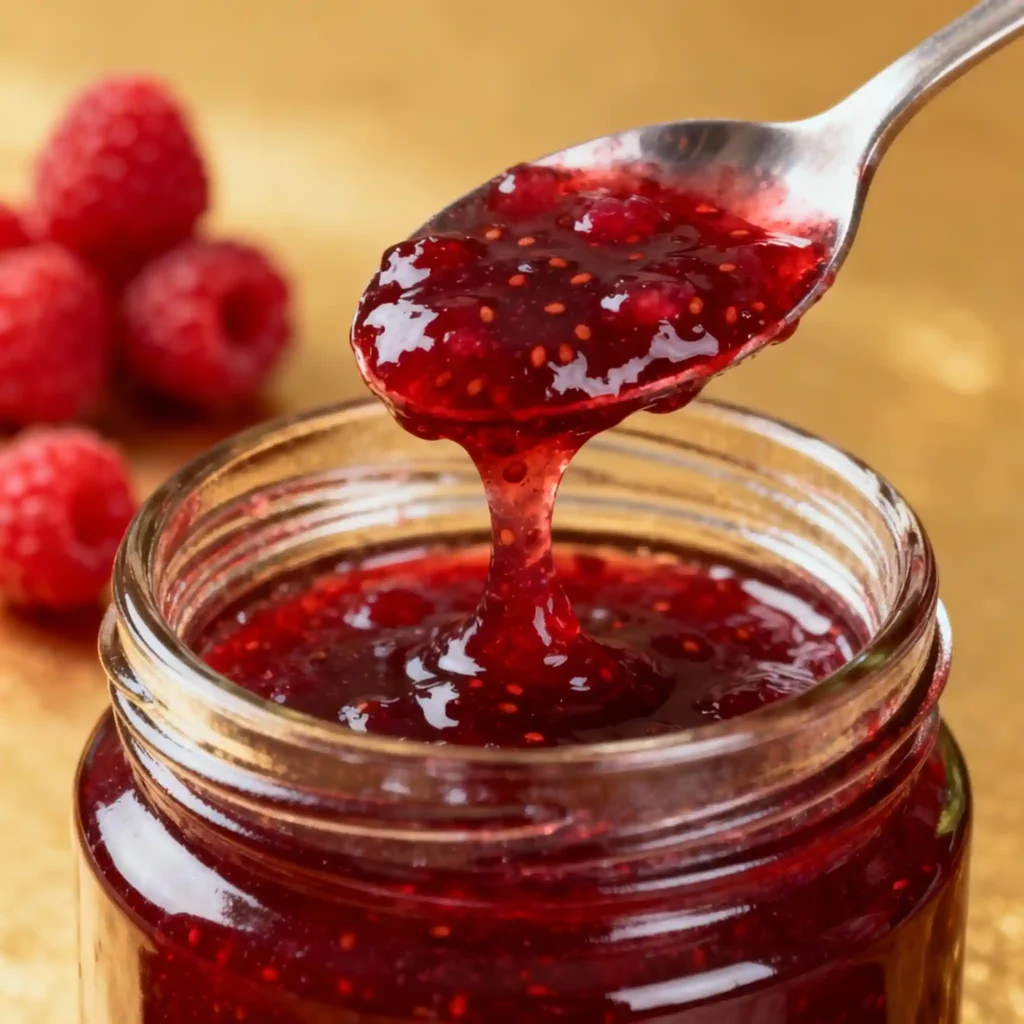
For a slightly lighter sweetness, try three parts fruit to two parts sugar. It creates a softer set but highlights the berry flavor more. Either way, boil until 220°F (the gel point), or test on a chilled plate — if it wrinkles slightly when pushed, it’s ready.
This same no-pectin approach also shines in our Canning Apple Jelly, where apples provide their own natural thickener.
The Step-by-Step Raspberry Jam Canning Process
Cooking jam without boxed pectin

Once your raspberries are mashed and measured, you’re ready to cook. This part of canning raspberry jam is surprisingly quick. Combine the fruit and sugar in a large, heavy-bottomed pot. Set the heat to medium-high and stir constantly to prevent scorching.
As the mixture heats, it will bubble and begin to thicken. In about 8 to 12 minutes, it should reach the gel stage—220°F on a candy thermometer. If you don’t have one, use the freezer plate test: drop a small spoonful of jam onto a chilled plate, let it sit for 30 seconds, then run your finger through it. If it wrinkles, it’s ready.
Be careful not to overcook. Jam that’s cooked too long can become thick, sticky, or even hard once it cools. It should still look pourable when you ladle it into jars. This is the moment where flavor and texture come together—and it all happens with just two ingredients.
If you love small-batch canning, try experimenting with similar fruits like Canning Blueberry Jam — another vibrant preserve that captures the natural sweetness of summer berries.
Safe water bath canning instructions
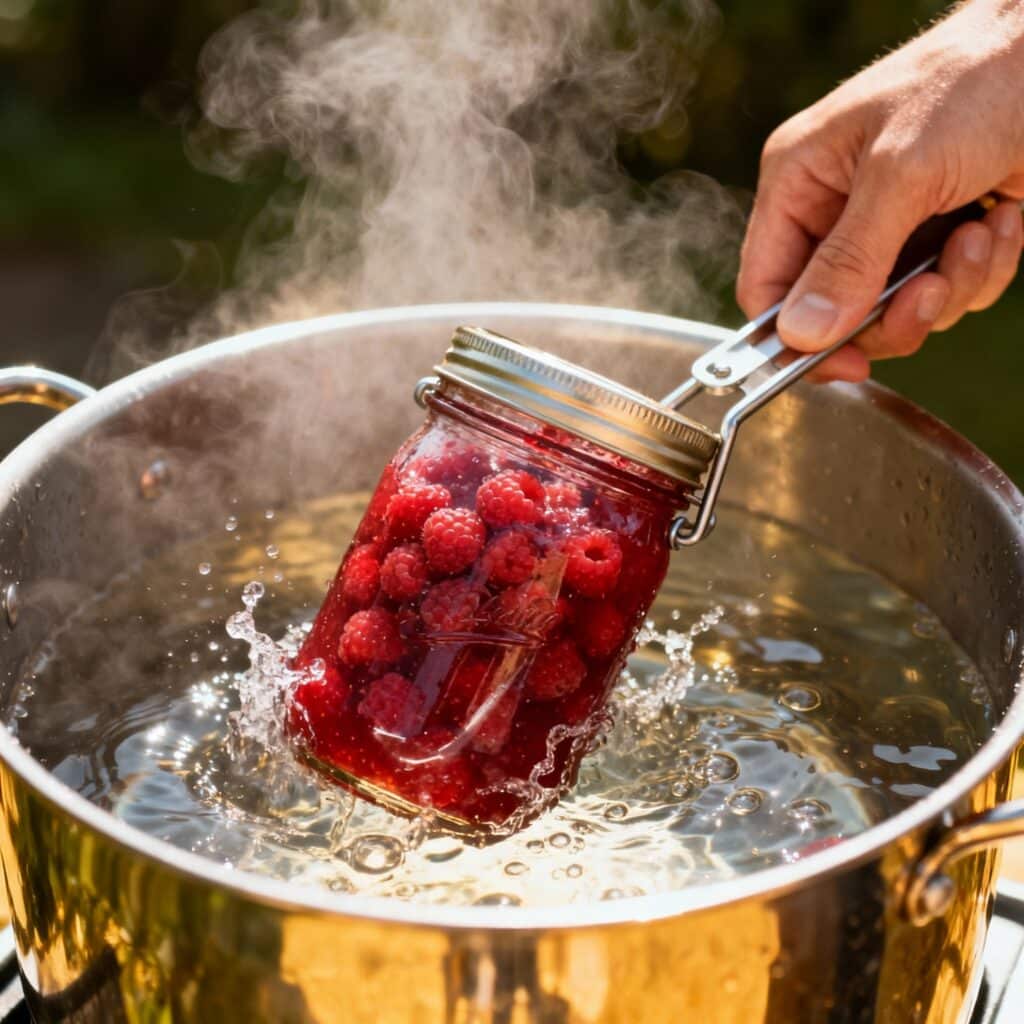
Now let’s seal the deal—literally. While your jam is cooking, sterilize your jars by boiling them in a water bath canner for 10 minutes. Keep them hot until you’re ready to fill.
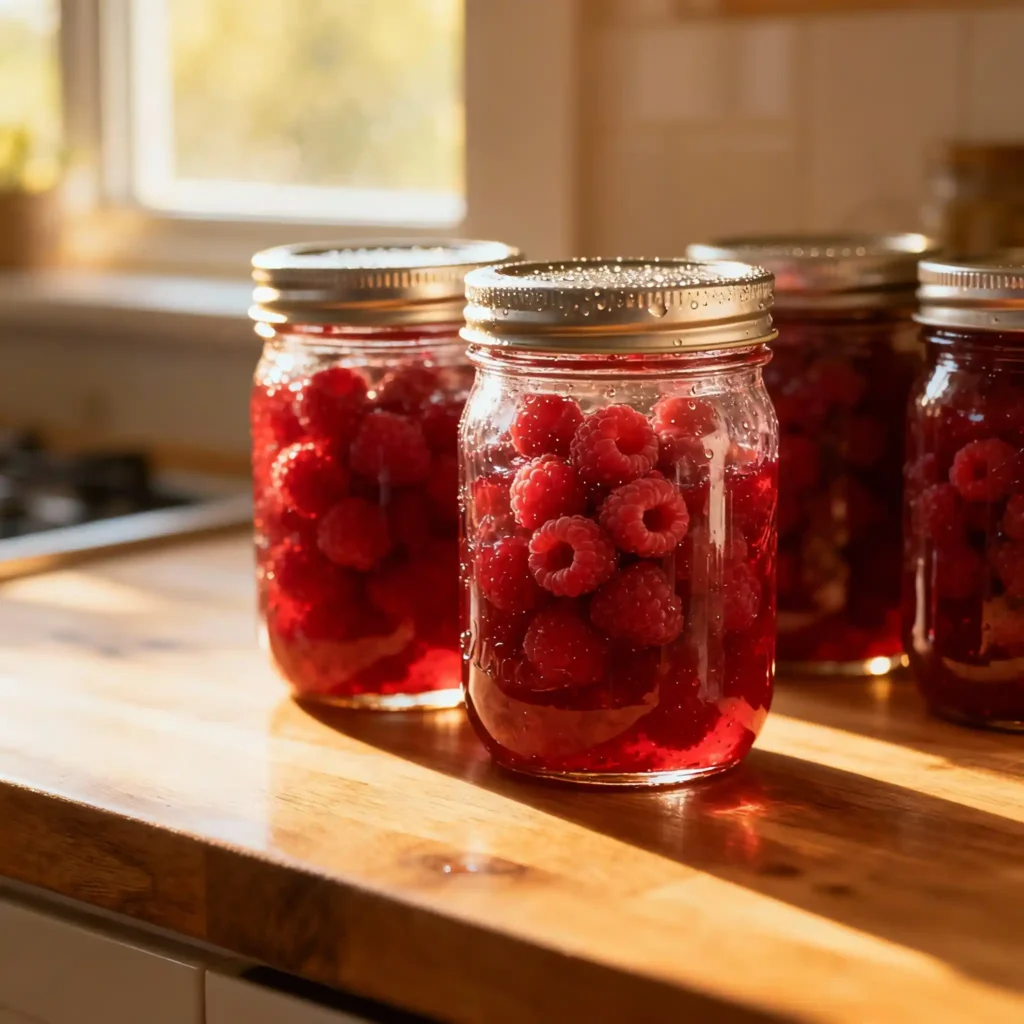
When the jam is ready, ladle it into jars, leaving ¼ inch of headspace. Wipe the rims clean with a damp cloth to ensure a proper seal. Add your lids and screw on the bands until they’re fingertip-tight.
Process the jars in a boiling water bath for 10 minutes (or 15 minutes if you’re above 6,000 feet in elevation). When time’s up, remove the jars carefully using a jar lifter and place them on a towel-lined counter. Leave space between jars and let them cool undisturbed for 12–24 hours.
Once cooled, check the seals by pressing the center of each lid. If it doesn’t move, you’re good. If it pops back, store that jar in the fridge and use it first.
This classic canning method is exactly what’s used in other recipes like Canning Grape Jelly, giving every jar a safe, shelf-stable seal that lasts months.
Tips for Perfect Raspberry Jam Every Time
Common mistakes to avoid
Even a simple recipe like this can go sideways if you’re not careful. One of the most common mistakes when canning raspberry jam is undercooking. If the jam doesn’t reach 220°F or pass the wrinkle test, it won’t set properly. On the flip side, overcooking can cause it to become thick and gritty once cooled.
Make sure to use a wide, deep pot—jam can foam and boil over fast. Stir constantly, especially as it gets close to setting, to avoid scorching. And always clean the jar rims before sealing. A sticky rim can stop a jar from sealing, no matter how perfect the jam inside.
For step-by-step jar prep, check out our Canning Blackberry Jam Secrets, which includes practical safety tips for first-time canners.
Storage, shelf life & freezing options
Properly canned raspberry jam keeps its flavor and texture for 12 to 18 months when stored in a cool, dark place. Once opened, refrigerate and use within a few weeks. If you’d rather skip the canning process, you can freeze the jam in freezer-safe containers. Just leave room at the top for expansion.
Freezer jam stays good for up to 6 months and still delivers that summer-sweet flavor in every spoonful.
Frequently Asked Questions (FAQs)
How long to process raspberry jam for canning?
Process jars in a boiling water bath canner for 10 minutes. If you live above 6,000 feet, increase the time to 15 minutes to ensure a safe seal.
Will raspberry jam set without pectin?
Yes. Raspberries contain natural pectin. As long as you boil the mixture to 220°F or use the wrinkle test, your jam will set just fine without any boxed pectin.
What is the raspberry jam rule?
It’s the classic 1:1 ratio—one cup of mashed raspberries to one cup of sugar. This balance delivers the perfect sweet-tart flavor and ensures a consistent set.
Can you pressure can raspberry jam?
No. Pressure canning is not recommended for jam. The high heat can ruin the texture and isn’t necessary. Raspberry jam is acidic enough to be safely preserved with water bath canning.
Final Thoughts
Canning raspberry jam is more than a recipe — it’s a rhythm of the seasons. With every batch, you capture the essence of summer in a jar: bright, tangy, and deeply satisfying.
Whether you’re just starting out or adding to your collection of homemade preserves, this recipe will become a yearly tradition. Pair it with your next batch of Canning Blueberry Jam for a beautiful variety of berry flavors, or try the sweet-tart balance of Canning Apple Jelly to bring the taste of fall to your pantry.
Each jar is more than just food — it’s a memory sealed tight.
Print
Canning Raspberry Jam Made Simple: A Sweet, Reliable Way to Preserve Summer
- Total Time: 30 minutes
- Yield: 5 half-pint jars
- Diet: Vegetarian
Description
This easy raspberry jam recipe requires no pectin. It’s a simple way to preserve the flavor of fresh raspberries using just fruit and sugar.
Ingredients
4 cups mashed raspberries (from 4 pints of whole fruit)
4 cups granulated sugar
Optional: 1/2 tsp butter to reduce foaming
Instructions
1. Place mashed raspberries and sugar into a large pot.
2. Stir over medium-high heat until the mixture begins to boil.
3. Continue boiling for 8–12 minutes, stirring often, until it reaches 220°F or passes the freezer plate test.
4. Remove from heat and ladle hot jam into sterilized jars, leaving 1/4 inch headspace.
5. Wipe rims clean, apply lids and bands.
6. Process jars in a boiling water bath for 10 minutes (15 if above 6,000 feet).
7. Cool jars for 12–24 hours before storing. Check seals.
Notes
Use a wide pot to prevent boil-overs.
You can reduce sugar slightly using a 3:2 fruit-to-sugar ratio.
Jam keeps 12–18 months when properly canned and sealed.
- Prep Time: 15 minutes
- Cook Time: 15 minutes
- Category: Jam, Preserves
- Method: Canning
- Cuisine: American
Nutrition
- Serving Size: 1 tablespoon
- Calories: 83
- Sugar: 20g
- Sodium: 0.3mg
- Fat: 0.1g
- Saturated Fat: 0.002g
- Unsaturated Fat: 0.05g
- Trans Fat: 0g
- Carbohydrates: 21g
- Fiber: 1g
- Protein: 0.1g
- Cholesterol: 0mg


