Table of Contents
Table of Contents
Canning apple jelly is one of those old-fashioned kitchen traditions that never goes out of style. There’s something deeply satisfying about turning crisp fall apples into jewel-toned jars of sweetness you can enjoy all year long. Whether you picked apples from a local orchard or gathered them from your backyard tree, this recipe transforms them into something lasting and beautiful. In this guide, we’ll cover how to make apple jelly from scratch, how long to boil it, and whether apples are safe for water bath canning — all while keeping things simple, safe, and delicious.
The Story And Intro to Canning Apple Jelly
A Memory of Autumn in Every Spoon
When I was little, apple season meant bushels of fruit on our porch and the warm smell of cinnamon drifting from my grandmother’s kitchen. She had this big copper pot she used for canning apple jelly, and I can still picture her stirring the bubbling mixture with slow, steady circles, testing for just the right sheen. She’d always say, “It’s ready when it coats the spoon like sunshine.”
Making apple jelly feels like bottling up autumn itself — crisp mornings, falling leaves, and the kind of cozy warmth that makes your kitchen smell like home. Today, I follow her same process, though I use a modern canner instead of a copper pot. The results are every bit as delicious: clear, golden jelly that’s both sweet and lightly tart.
Homemade apple jelly for canning isn’t just a treat for breakfast; it’s a tradition worth keeping. It’s the kind of recipe that connects generations — simple, comforting, and endlessly shareable. And if you’ve ever enjoyed a spoonful of jelly on a biscuit or with a slice of cheese, you know exactly why it’s worth the effort.
If you love this type of nostalgic, homemade sweetness, you’ll also adore my Canning Grape Jelly — a classic pantry staple that captures the rich flavor of late-summer grapes — or try the vibrant Canning Raspberry Jam for a tart, ruby-red twist on tradition.
Why Homemade Apple Jelly Is Special
Store-bought jellies can’t compare to the clarity and flavor of homemade canned apple jelly. When you make it yourself, you control every ingredient — no additives, no artificial colors, just fruit, sugar, and time. Plus, apples have natural pectin, which means you can make a firm, beautiful jelly without needing any extra thickener.
Each jar you seal is a little time capsule of the season. That first taste in winter — when you spread it on warm toast or swirl it into yogurt — brings back the essence of fall. It’s the flavor of crisp air, family gatherings, and kitchen warmth, all in one spoonful.
And the process itself is surprisingly simple. Once you understand the steps — simmering, straining, and sealing — it becomes second nature. Soon, you’ll be filling your pantry with ruby and amber-colored jars that gleam like treasures.
If you enjoy preserving fruit, try branching out with Canning Blueberry Jam. Its deep, rich flavor pairs beautifully with everything from biscuits to yogurt parfaits.
Key Ingredients for Small-Batch Canning Apple Jelly

| Ingredient | Amount | Purpose |
|---|---|---|
| Fresh Apples (any variety) | 4 lbs (about 8 medium) | Provides flavor and natural pectin |
| Water | 4 cups | Used to extract apple juice |
| Granulated Sugar | 3 cups | Sweetens and helps jelly set |
| Lemon Juice | 2 tablespoons | Balances flavor and improves gelling |
| Pectin (optional) | 1 box (1.75 oz) | Ensures firmer set if apples are very ripe |
You’ll also need Mason jars, new lids, and a large pot or water bath canner to process and seal your jelly safely. The process may sound old-fashioned, but once you get started, you’ll realize how straightforward it really is.
Before You Begin
In the next section, we’ll walk through how to prepare, cook, and can apple jelly safely — from boiling the fruit to getting that perfect set. We’ll also answer one of the most common questions: Does apple jelly need pectin?
Preparing and Canning Apple Jelly Safely
Does Apple Jelly Need Pectin?
The short answer: not always. Apples naturally contain pectin, the magic ingredient that helps jelly set. If your apples are slightly underripe, they’ll provide plenty on their own. However, if your apples are very ripe or if you’re using sweeter varieties like Gala or Fuji, you might need a little boost from boxed pectin to get that perfect gel.
To make apple jelly without pectin, start by chopping your apples — cores, peels, and all — into chunks. Combine them with water in a large pot and simmer for about 25–30 minutes until soft. Strain the mixture through a fine mesh or cheesecloth overnight to collect clear apple juice. That liquid is your jelly base.
The next day, measure your juice and add an equal amount of sugar. Stir in a bit of lemon juice to brighten the flavor and help with the set. Boil the mixture until it reaches 220°F, the gelling point for jelly. To test, drop a bit on a cold plate — if it wrinkles slightly when pushed, your jelly is ready.
Using pectin can make the process quicker and more reliable, especially for beginners. But either way, you’ll end up with beautifully clear, golden jelly that tastes like the essence of fall.
For reference, you can see a similar process in my Canning Blackberry Jam Secrets post, which explains how to test for perfect consistency every time.
Preparing for the Canning Process
Before you start canning, it’s essential to prep your jars and workspace. Cleanliness and temperature control are key for safety and success.
- Sterilize your jars. Wash Mason jars in hot, soapy water, rinse well, and place them in boiling water for at least 10 minutes.
- Warm the lids and bands. Keep them in a small pot of hot (not boiling) water until ready to use.
- Heat your jelly. Bring it back to a full rolling boil, stirring often so it doesn’t scorch.
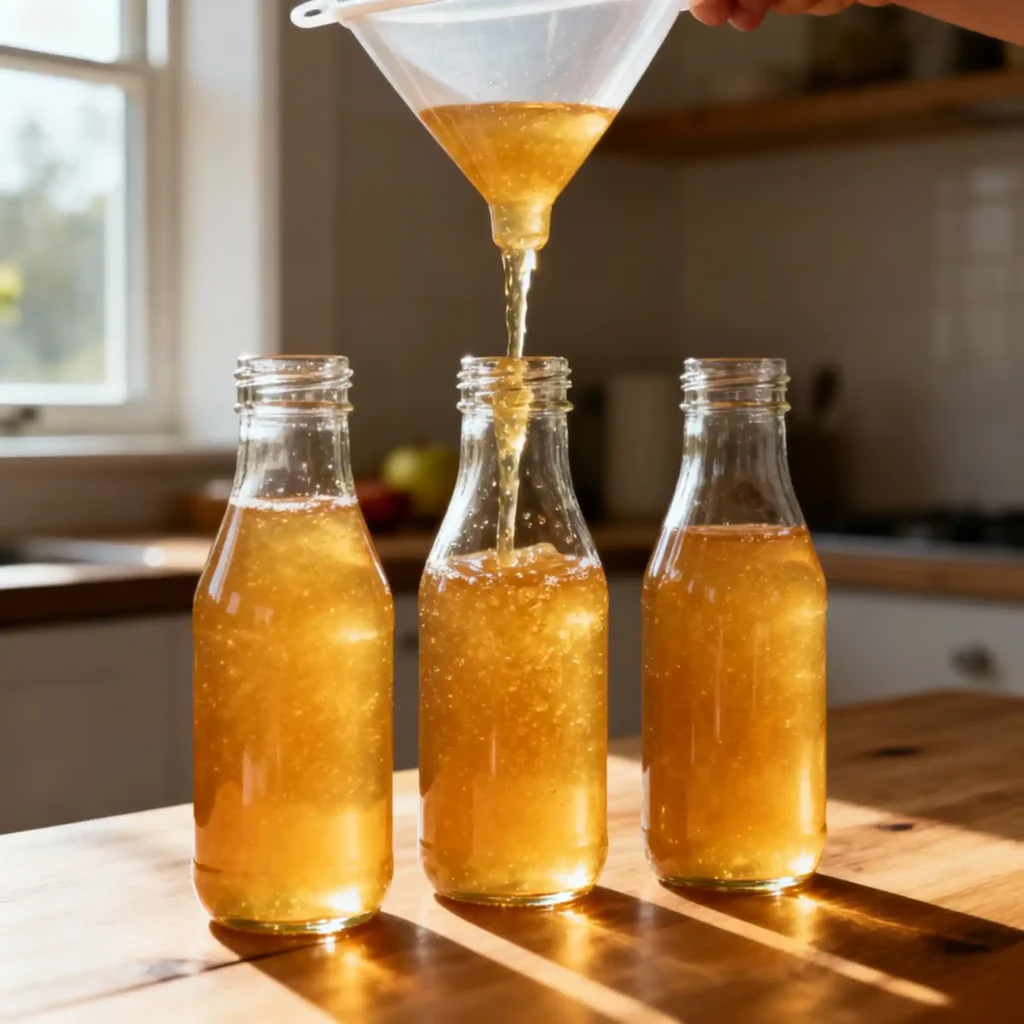
- Fill the jars. Using a ladle and funnel, pour hot jelly into hot jars, leaving ¼ inch of headspace.
- Wipe the rims clean to ensure a good seal, then tighten the lids just fingertip tight.
Now you’re ready for the water bath — a crucial step that keeps your jelly safe for long-term storage.
If you enjoy the science of timing and texture, my Canning Raspberry Jam article explains how to balance heat and sugar for a perfect gel without losing that fresh berry flavor.
Quick Safety Table for Canning Apple Jelly
| Step | Purpose | Tip for Best Results |
|---|---|---|
| Sterilize jars | Kills bacteria and prevents spoilage | Boil jars 10 minutes before use |
| Heat lids and bands | Helps proper sealing | Don’t boil; just keep hot |
| Fill with hot jelly | Creates vacuum seal | Maintain ¼ inch headspace |
| Process in water bath | Ensures safe storage | Boil jars for 10 minutes |
| Cool and test seals | Confirms preservation | Lids should “pop” and stay flat |
What You’ll Learn Next
In the next part, we’ll answer two key questions — How long do you boil apple jelly? and Are apples safe for water bath canning? — plus share simple tricks to get that crystal-clear jelly every time.
Boiling, Setting, and Water Bath Safety for Apple Jelly
How Long Do You Boil Apple Jelly?
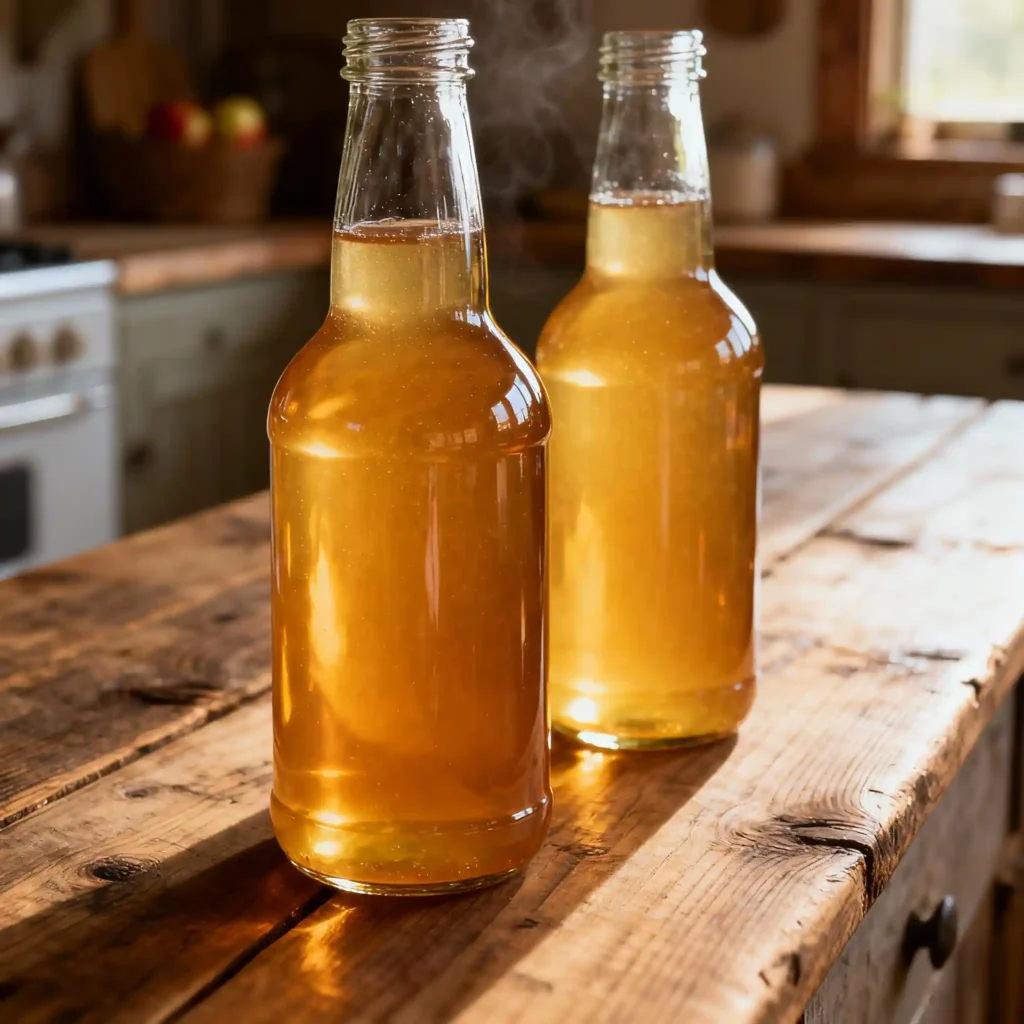
Boiling time is everything when it comes to canning apple jelly. The right timing determines whether your jelly sets perfectly or stays runny. Most small-batch apple jellies need about 20 to 25 minutes of boiling after you add the sugar — but it’s not just about the clock. It’s about the texture.
You’ll know your jelly is ready when it reaches the gel point at 220°F (measured with a candy thermometer). If you don’t have one, use the plate test: place a small spoonful of jelly on a chilled plate, wait 30 seconds, and gently push it with your finger. If it wrinkles slightly, your jelly is done. If it runs, keep boiling for another minute and test again.
Consistency comes down to patience. Stir often, but don’t rush it — a gentle, rolling boil works better than a hard one. It keeps the jelly clear and prevents cloudiness. Over-boiling can make your jelly too thick or dark, while under-boiling leaves it loose. The sweet spot is that golden, glossy finish that coats the spoon beautifully.
If you enjoy learning hands-on techniques like this, you’ll love my Veganes Gelee recipe — it’s another pectin-based preserve that teaches the art of timing for a perfect set.
Are Apples Safe for Water Bath Canning?
Yes — apples are completely safe for water bath canning, as long as you balance their acidity properly. Apples are naturally high in acid, which makes them ideal for canning jellies, sauces, and butters. The addition of lemon juice ensures that your canning apple jelly stays in a safe pH range for long-term preservation.
To safely process your apple jelly, place your filled jars in a boiling water bath and make sure they’re fully submerged with at least an inch of water covering the lids. Once the water returns to a full boil, process for 10 minutes (adjusting for altitude if necessary). When finished, carefully remove the jars and let them cool undisturbed on a towel for 12 to 24 hours.
Here’s a quick guide for water bath canning times based on your altitude:
| Altitude (feet) | Processing Time (minutes) | Notes |
|---|---|---|
| 0–1,000 ft | 10 minutes | Standard boiling time for most areas |
| 1,001–3,000 ft | 15 minutes | Add 5 minutes for moderate elevation |
| 3,001–6,000 ft | 20 minutes | Longer boiling needed at high altitudes |
| 6,001+ ft | 25 minutes | Thin air requires extra processing time |
After processing, check your jar seals by pressing the center of each lid. A properly sealed jar won’t flex up or down. Any that didn’t seal should be refrigerated and used within a few weeks.
For more classic preserves, try my Canning Grape Jelly or revisit the secrets behind perfect texture in Canning Blackberry Jam Secrets.
Tips for Clear, Beautiful Apple Jelly
- Use a fine mesh strainer or cheesecloth for clarity. Avoid pressing the pulp — it clouds the jelly.
- Keep your boil steady, not furious — that’s how you get sparkle-clear jelly.
- Always measure sugar and juice equally for proper balance.
- Skim off foam before pouring into jars for a clean finish.
- Don’t double the recipe — small batches cook evenly and set better.
How Long Should Jelly Be in a Water Bath?
When canning apple jelly, you’ll want to process your filled jars in a boiling water bath for 10 minutes if you’re at sea level. The heat ensures your jars seal properly and remain shelf-stable. If you live at a higher elevation, increase the time slightly to maintain the same safety level — usually by 5 minutes for every 2,000 feet above sea level.
Make sure your jars are fully submerged, with at least one inch of water covering the tops. After processing, carefully lift the jars from the pot using a lifter and place them on a towel to cool. You’ll start hearing that satisfying pop as each lid seals — a sign your jelly is perfectly preserved.
Once the jars have cooled for 12 to 24 hours, check the seals and label them with the date. Properly canned apple jelly can last up to 18 months in a cool, dark pantry without losing its flavor or texture.
For more canning ideas, you can revisit Canning Grape Jelly or try a refreshing twist with my Lemon Balm Recipe — both use similar preservation techniques for long-lasting flavor.
Quick FAQ Roundup
Does apple jelly need pectin?
Not always. Apples contain natural pectin, especially when slightly underripe.
How long do you boil apple jelly?
Boil for 20–25 minutes or until it reaches 220°F and passes the wrinkle test.
Are apples safe for water bath canning?
Yes, apples are high in natural acid, making them perfectly safe for canning.
How long should jelly be in a water bath?
Process for 10 minutes at sea level, adjusting time for altitude.
The Joy of Homemade Apple Jelly
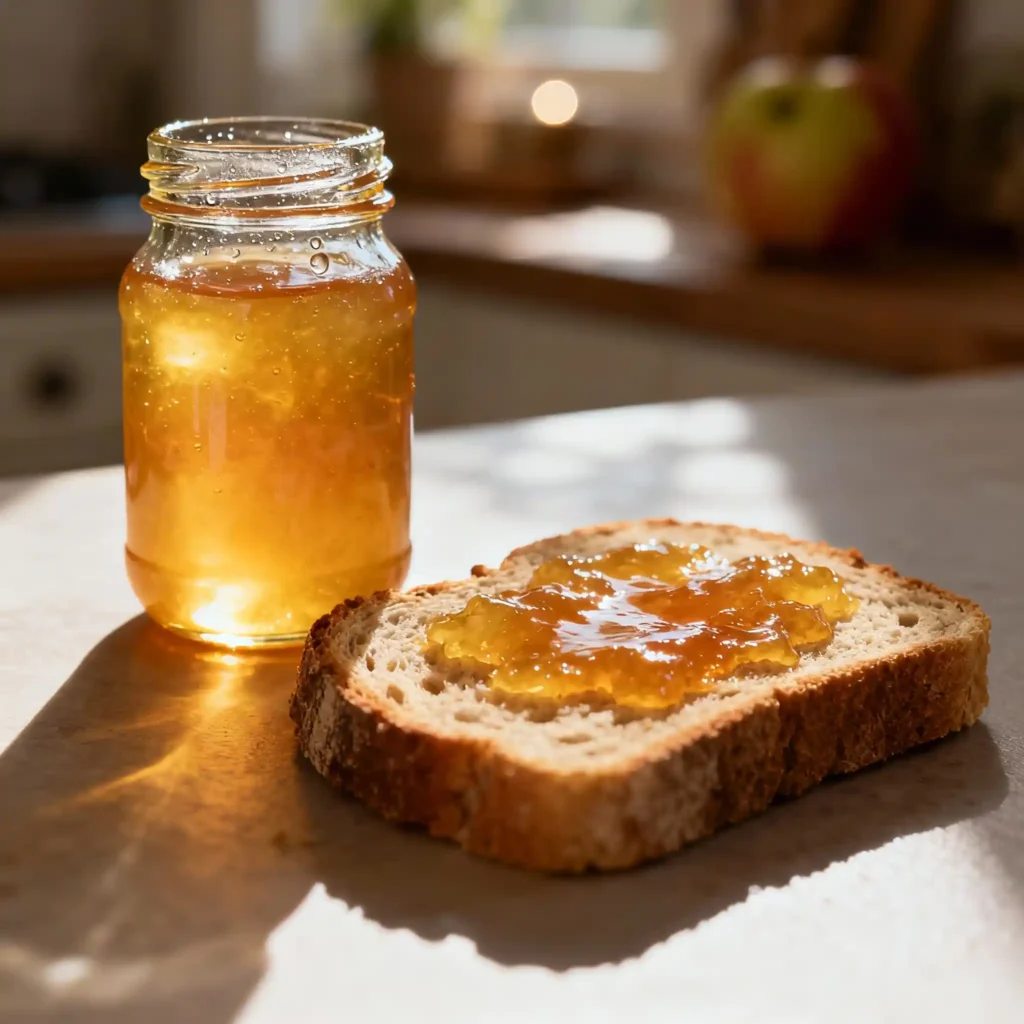
Making canned apple jelly isn’t just about preserving fruit — it’s about preserving memories. There’s something deeply rewarding about hearing those lids seal, knowing you’ve created something from scratch that will brighten breakfasts for months to come.
Each jar tells a story: crisp autumn mornings, warm kitchens, and time spent doing something meaningful. Whether you spread it over toast, melt it into a glaze for pork, or gift it to a neighbor, homemade apple jelly brings warmth and connection to every table.
The process might be simple, but the results are pure magic — a golden sweetness that captures fall in a jar.
Print
Canning Apple Jelly: Homemade Sweetness in Every Jar
- Total Time: 1 hour
- Yield: 5 half-pint jars
- Diet: Vegetarian
Description
This homemade apple jelly recipe captures the taste of fall in every jar — sweet, golden, and perfect for spreading on toast or gifting to loved ones.
Ingredients
4 lbs fresh apples (about 8 medium, any variety)
4 cups water
3 cups granulated sugar
2 tablespoons lemon juice
1 box (1.75 oz) pectin (optional)
Instructions
1. Wash and roughly chop the apples, keeping peels and cores for natural pectin.
2. Place apples and water in a large pot. Simmer for 25–30 minutes until soft.
3. Strain through cheesecloth overnight to collect clear apple juice.
4. Measure the juice and pour into a clean pot. Add an equal amount of sugar.
5. Add lemon juice and bring to a rolling boil over medium-high heat.
6. If using pectin, stir it in and continue boiling for 1 more minute.
7. Test for setting point at 220°F or use the wrinkle test on a cold plate.
8. Skim foam from the top, then pour hot jelly into sterilized glass bottles or jars.
9. Leave ¼ inch headspace, wipe rims, and seal with lids.
10. Process the jars in a boiling water bath for 10 minutes, adjusting for altitude.
11. Remove jars and let cool for 12–24 hours before checking seals.
Notes
Use slightly underripe apples for better natural pectin.
If jelly doesn’t set, reheat and boil for another 1–2 minutes.
Store sealed jars in a cool, dark pantry for up to 18 months.
Refrigerate any unsealed jars and use within 3 weeks.
- Prep Time: 20 minutes
- Cook Time: 40 minutes
- Category: Canning, Preserves
- Method: Water Bath Canning
- Cuisine: American
Nutrition
- Serving Size: 1 tablespoon
- Calories: 45
- Sugar: 11g
- Sodium: 0mg
- Fat: 0g
- Saturated Fat: 0g
- Unsaturated Fat: 0g
- Trans Fat: 0g
- Carbohydrates: 12g
- Fiber: 0.3g
- Protein: 0g
- Cholesterol: 0mg


